
How to use a goniometer: Step-by-step technique
Clinical how-to · Reviewed by Kevin Lan, OTR/L, ATP · Updated July 2026
To use a goniometer, center its fulcrum over the joint's axis of rotation, align the stationary arm with the bone of the proximal segment and the moving arm with the bone of the distal segment, move the joint from neutral to end range, then re-check the alignment and read the angle in degrees. The instrument is simple — the skill is in the landmarks, and in doing it the same way every time. This guide covers the technique step by step, the mistakes that cost degrees, and the smartphone method that removes the hardest step entirely.
Skip the arm alignment. Your iPhone reads the angle against gravity, with guided placement for 55 movements — free to measure. Get the free app
 Scan with your iPhone camera to get Goniometer
The parts of a universal goniometer
A universal goniometer has three parts, and each maps to a piece of anatomy during a measurement:
- Fulcrum (axis). The center of the protractor body. It sits over the joint's axis of rotation, located by a bony landmark.
- Stationary arm. Fixed to the protractor body. It lies along the proximal segment — the bone that stays put.
- Moving arm. Rotates around the fulcrum. It follows the distal segment — the bone that moves.
The scale reads 0–180° (most clinical goniometers print both a 0–180 and a 180–0 scale; read the one that starts at your zero). Sizes range from pocket 6-inch models for the wrist and hand to 12-inch models whose longer arms reach the landmarks of the hip and knee. A bubble or digital inclinometer measures the same thing with gravity as the reference instead of a second arm.
Step-by-step: Measuring joint ROM
- Position the patient. Use the standard testing position for the joint — supine for knee flexion, seated with the elbow at the side for elbow flexion. Expose the joint and stabilize the proximal segment so the motion you measure comes from the target joint only.
- Find the bony landmarks. Every movement has three: the axis, a proximal reference, and a distal reference. For knee flexion they are the lateral femoral epicondyle (axis), the greater trochanter (proximal), and the lateral malleolus (distal). Palpate them — don't estimate through clothing.
- Align the goniometer at the start. Fulcrum over the axis, stationary arm toward the proximal landmark, moving arm toward the distal landmark. In anatomical neutral the scale should read 0°. If the joint can't reach neutral, note the actual start angle — that deficit is a finding, not an error.
- Move the joint through its range. Actively (the patient moves) or passively (you move the relaxed limb) — AROM and PROM are documented differently, so decide which you're measuring before you start. Watch for substitution: a trunk lean during shoulder flexion or pelvic tilt during hip motion inflates the number.
- Realign and read at end range. The joint axis shifts slightly as the joint moves, so re-check all three alignments before reading. Read the scale at eye level, on the scale that started at your zero, to the nearest degree.
- Record it. Joint, movement, side, degrees, AROM or PROM — for example, "R knee flexion 120° AROM." A joint that falls short of neutral is recorded as a negative value (knee extension −10° means 10° short of straight). Compare against the AAOS normal values and, when possible, the patient's other side.
The mistakes that cost degrees
- Eyeballing the landmarks. Misplaced arms are the largest source of error in goniometry. Palpate, and use the same landmarks every visit.
- Not stabilizing the proximal segment. If the "stationary" bone moves, its motion is silently added to your reading.
- Reading the wrong scale. Two printed scales means a 40° arc can be misread as 140°. Follow the scale that started at your zero.
- Changing patient position between visits. Supine and seated measurements of the same joint are different numbers. Repeatability comes from protocol, not the instrument.
- Reading before the end range settles. Take the measurement at a steady, firm end range — not mid-movement.
The smartphone method
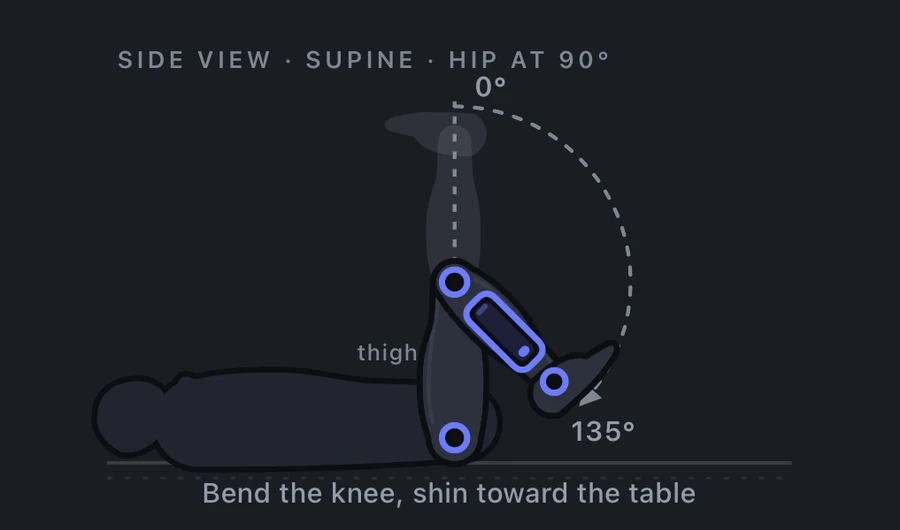
A smartphone goniometer app replaces the fulcrum-and-two-arms alignment with a single placement: the phone lies flat against the moving segment, you set zero at the starting position, and the gravity-referenced sensors read the angle continuously — the same principle as the clinical inclinometer. That removes the eyeballed alignment step that causes most goniometry error, which is why peer-reviewed research, including a 37-study systematic review, has found the method as valid and reliable as the universal goniometer, and in several studies more repeatable. The technique fundamentals above still apply: same patient position, same landmark, zero at true neutral, steady end range.
Per-joint technique guides
Landmarks, testing positions, normal values, and reliability evidence for each joint: knee, shoulder, hip, elbow, wrist, hand & fingers, ankle, and cervical spine. For a one-page reference of every normal value, download the printable AAOS ROM chart (PDF).
Frequently asked questions
How do you use a goniometer?
Fulcrum over the joint axis, stationary arm along the proximal bone, moving arm along the distal bone; move the joint from neutral to end range, re-check the alignment, and read the degrees. Consistency of position and landmarks is what makes the number repeatable.
Which arm of the goniometer moves?
The moving arm follows the distal (moving) segment; the stationary arm stays on the proximal segment. For elbow flexion: stationary arm along the humerus, moving arm along the forearm.
Where does the fulcrum go?
Over the joint's axis of rotation, found by a bony landmark — the lateral epicondyle for elbow flexion, the lateral femoral epicondyle for knee flexion. Re-check it at end range, because the true axis shifts as the joint moves.
What's the difference between AROM and PROM?
Active ROM is the patient's own movement; passive ROM is you moving the relaxed limb, and it normally reaches slightly further. Record which one you measured — the documentation guide covers the notation.
How accurate is a universal goniometer?
Reliable to roughly 5° in trained hands, best when the same examiner repeats the same protocol. Most error is alignment and positioning, not the instrument — which is what the smartphone inclinometer method is designed to remove.
Can I use my phone instead?
Yes — place the phone flat on the moving segment, set zero, move to end range. A 37-study systematic review found smartphone goniometry valid and reliable versus the universal goniometer.
Skip the alignment, keep the accuracy. Goniometer guides placement for 55 movements with AAOS normal values beside every reading — free to measure on your iPhone. Readings save to patient profiles and export as PDF or CSV reports, and patient data stays encrypted on the device. Download Goniometer on the App Store.
References
- Norkin CC, White DJ. Measurement of Joint Motion: A Guide to Goniometry. 5th ed. Philadelphia: F.A. Davis; 2016. Standard text for goniometer alignment, testing positions, and landmarks.
- American Academy of Orthopaedic Surgeons. Joint Motion: Method of Measuring and Recording. Chicago: AAOS; 1965. Normative range-of-motion reference values, as used throughout the Goniometer app.
- Keogh JWL, Cox A, Anderson S, et al. Reliability and validity of clinically accessible smartphone applications to measure joint range of motion: A systematic review. PLOS ONE. 2019;14(5):e0215806. doi:10.1371/journal.pone.0215806
- Milanese S, Gordon S, Buettner P, et al. Reliability and concurrent validity of knee angle measurement: Smart phone app versus universal goniometer used by experienced and novice clinicians. Man Ther. 2014;19(6):569-574. doi:10.1016/j.math.2014.05.009
Goniometer is an educational and reference tool. It is not a medical device and is not intended for diagnosis or treatment decisions.